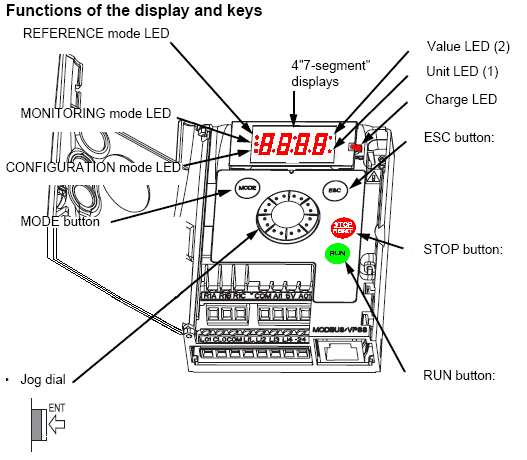
With the seven segment display showing RDy press the center of the Jog Dial which from now on will be referred to as ENTER, then press the MODE button until the display shows COnF.
At this point press ENTER and then by rotating the Jog Dial scroll down until the display shows FULL and again press ENTER. The display should now show CFG, from here again using the Jog Dial scroll down until the display shows FUN and again press ENTER the display will now show rPt, scroll down to rrS and press ENTER.
Here you select the digital input you require to be the signal to send the drive in the reverse direction, if your drive is connected in 2 - wire configuration LI1 is reserved for Forward and any of the other inputs can be assigned to reverse. Normally it is LI2 which is used as reverse so to select your input scroll down until the display shows the required input i.e. L2H and press ENTER, this means that when LI2 is high the drive will run in the reverse direction.
If the drive is being operated in 3 - wire configuration the possible inputs you can use are limited as LI1 becomes the stop signal and LI2 is now run Forward so in this case you can only assign LI3 or LI4 as Reverse
Released for:Schneider Electric United Arab Emirates


