


How to update Unity Pro Hardware Catalog Manager with a new device .eds configuration?
This article discusses how a new .eds configuration file can be added to Unity Pro Hardware Catalog Manager.
1. Open Unity Pro Hardware Catalog Manager
Start menu -> All Programs -> Schneider Electric -> SoCollaborative -> Unity Pro -> Hardware Catalog Manager (Unity Pro software should be closed before opening the Hardware Catalog Manager)
2. Add a new Device “.eds” configuration
Right Click on the family (list) where the new device .eds configuration shall be added
“For example Right Click on Motion & Drive list”
Note: There is another way to add the new .eds configuration using Edit menu
Edit menu -> Add Device that will add the new .eds configuration under a new created list that shall be called “other”)

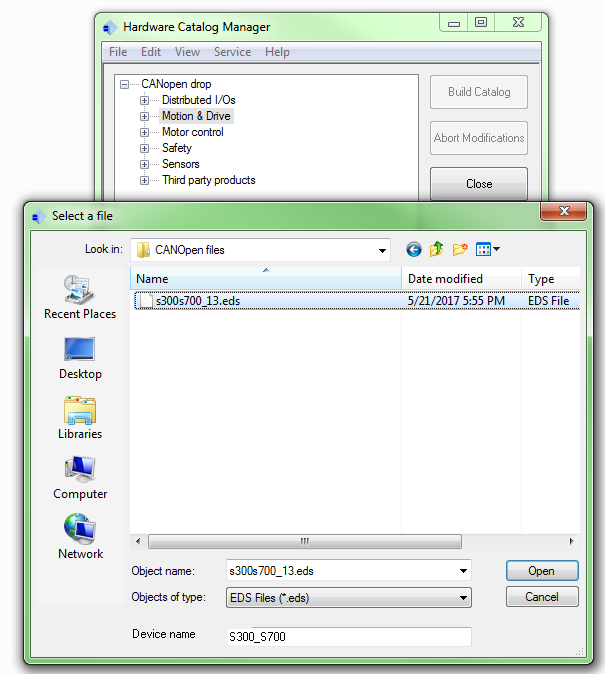
3. Select the .eds configuration file from the directory where it exists
4. Device Profile Window
Device profile of the new device .eds configuration file can be checked, when its window opens.
The Device family can also be changed to another one from family drop down list.
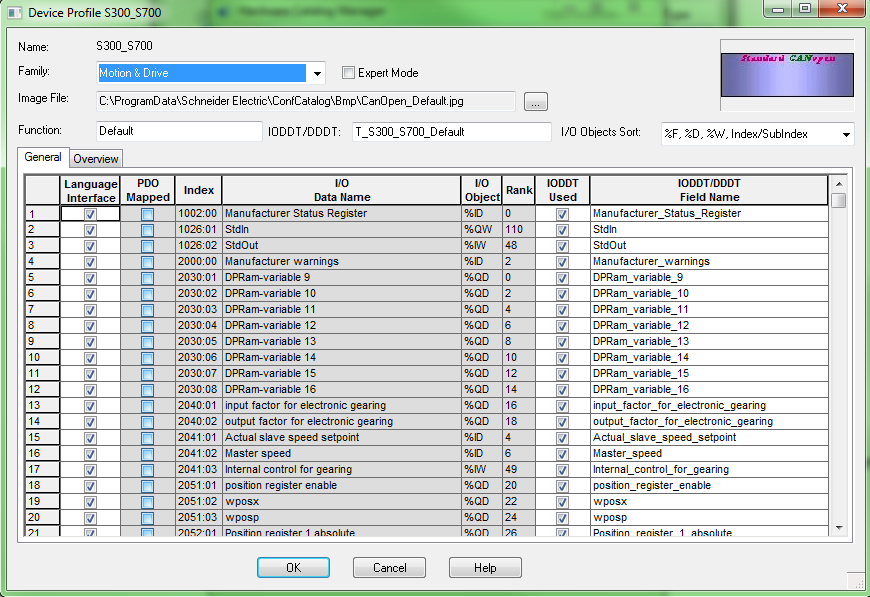
Click on OK to add the new device .eds to the Hardware Catalog Manager.
After few moments it can be noticed that new .eds has been already added under Motion and Drive family list
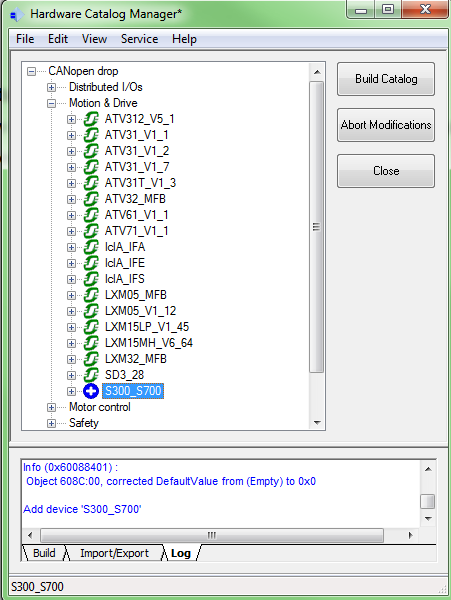
5. Build Catalog
It is mandatory to click on Build Catalog, to apply changes done to the Hardware Catalog.
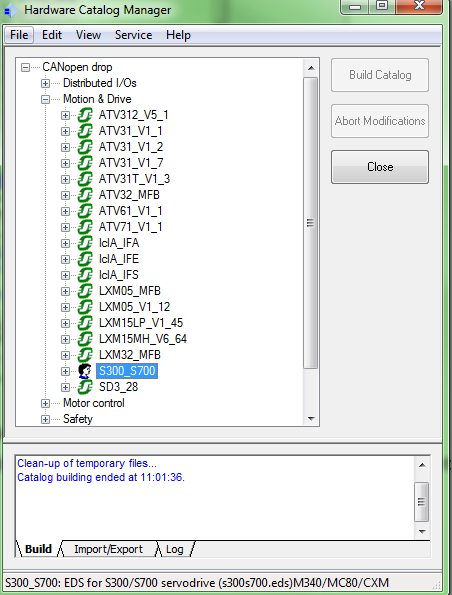
Close the Hardware Catalog Manager
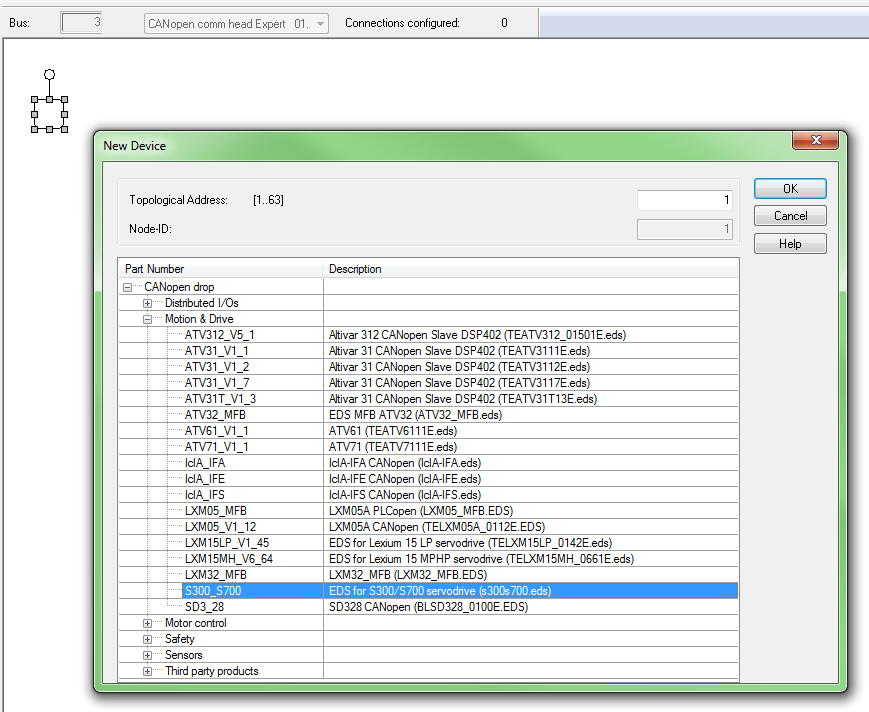
6. Add the new device .eds configuration to Unity Pro application
Open Unity Pro application file "a new application is created using M340 CPU “BMXP3420302”
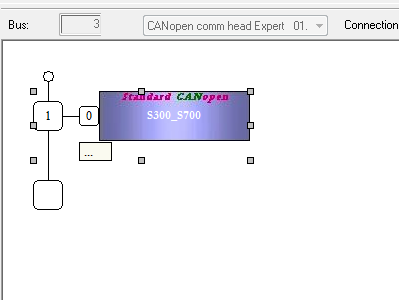
The new device .eds configuration can be found under Motion & Drive family list as shown in the following pictures
1. Open Unity Pro Hardware Catalog Manager
Start menu -> All Programs -> Schneider Electric -> SoCollaborative -> Unity Pro -> Hardware Catalog Manager (Unity Pro software should be closed before opening the Hardware Catalog Manager)
2. Add a new Device “.eds” configuration
Right Click on the family (list) where the new device .eds configuration shall be added
“For example Right Click on Motion & Drive list”
Note: There is another way to add the new .eds configuration using Edit menu
Edit menu -> Add Device that will add the new .eds configuration under a new created list that shall be called “other”)
3. Select the .eds configuration file from the directory where it exists
4. Device Profile Window
Device profile of the new device .eds configuration file can be checked, when its window opens.
The Device family can also be changed to another one from family drop down list.
Click on OK to add the new device .eds to the Hardware Catalog Manager.
After few moments it can be noticed that new .eds has been already added under Motion and Drive family list
5. Build Catalog
It is mandatory to click on Build Catalog, to apply changes done to the Hardware Catalog.
Close the Hardware Catalog Manager
6. Add the new device .eds configuration to Unity Pro application
Open Unity Pro application file "a new application is created using M340 CPU “BMXP3420302”
The new device .eds configuration can be found under Motion & Drive family list as shown in the following pictures
게시 대상: 슈나이더 일렉트릭 Korea
