


How to configure AFDD ( Arc fault Detection Device) in Ecostruxure power design-Ecodial?
In Ecodial, Below are the steps to configure AFDD.
Step-1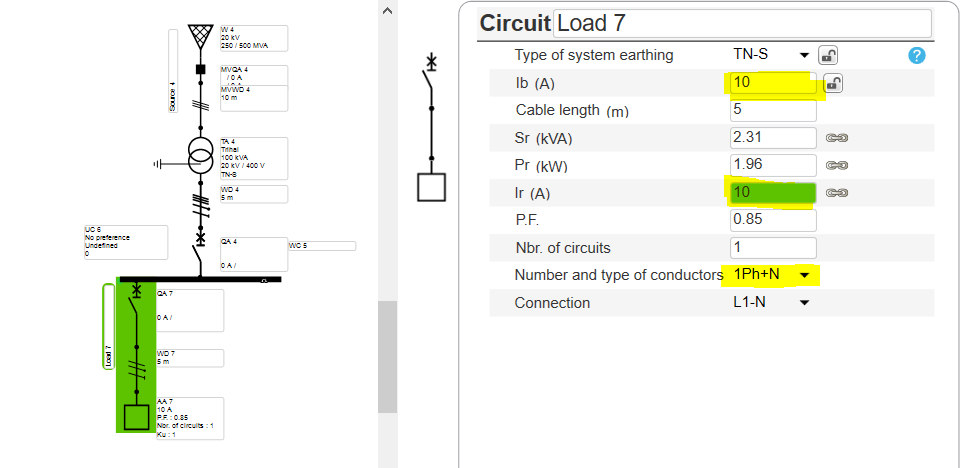
Step-2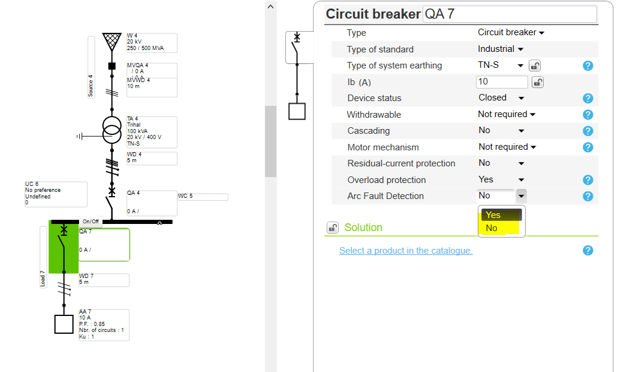
Step-3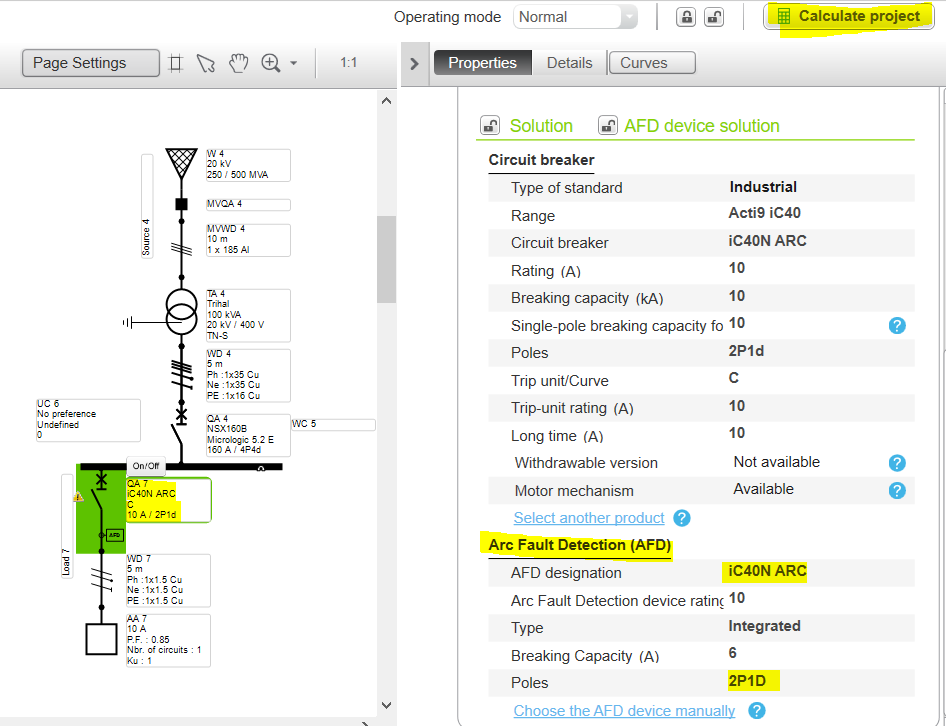
Step 4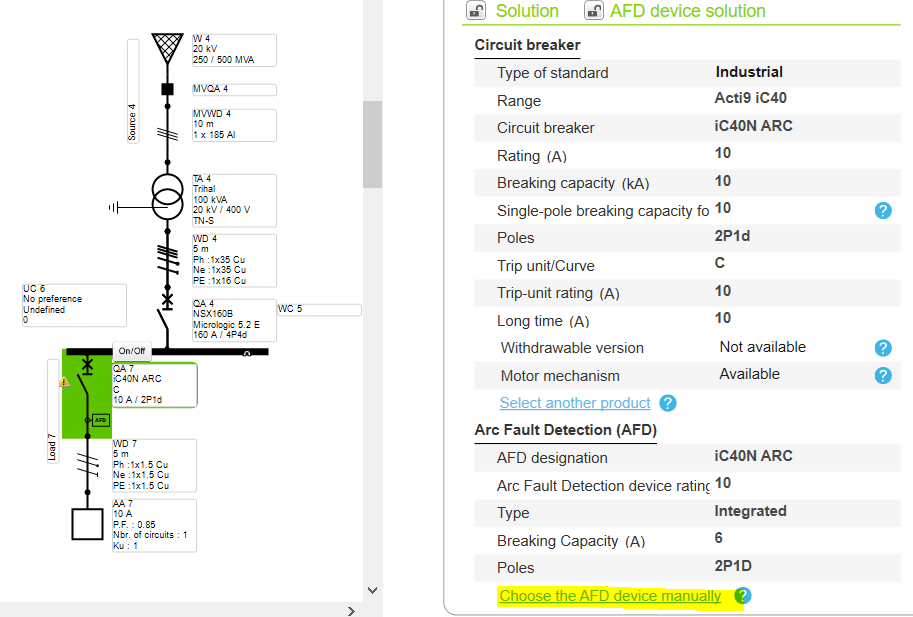
Step 5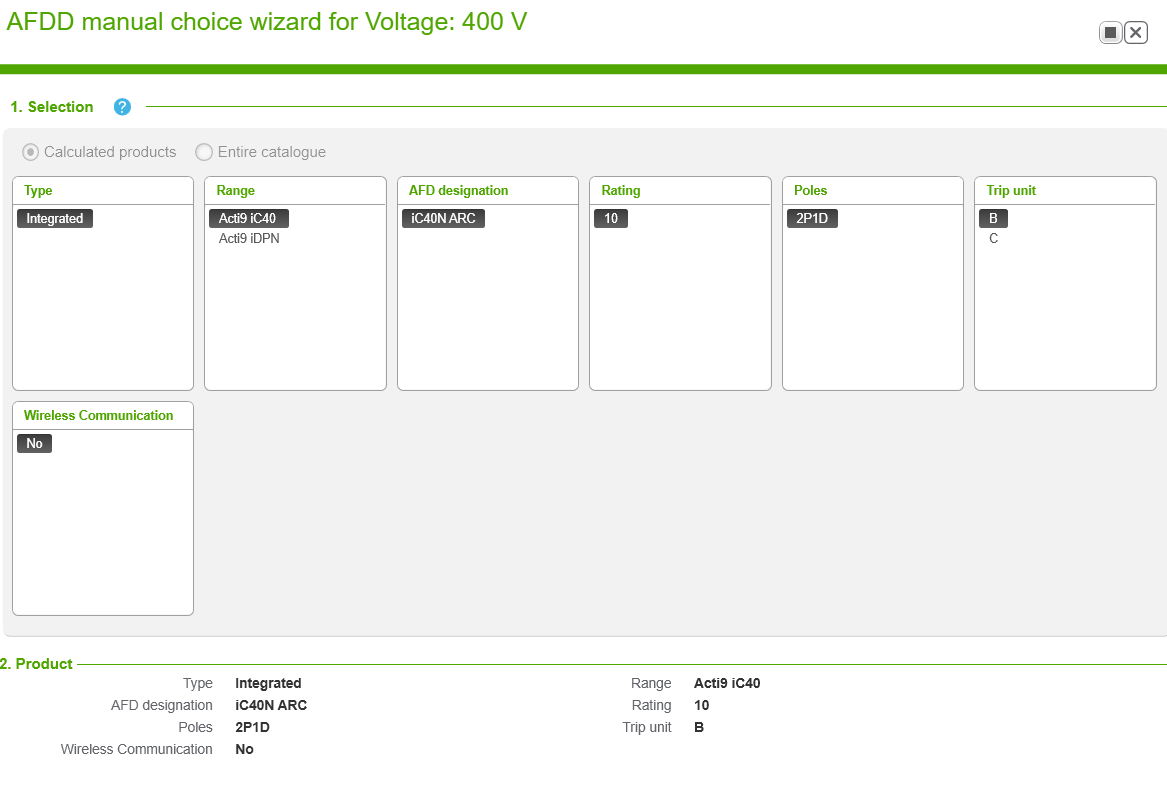
Step 6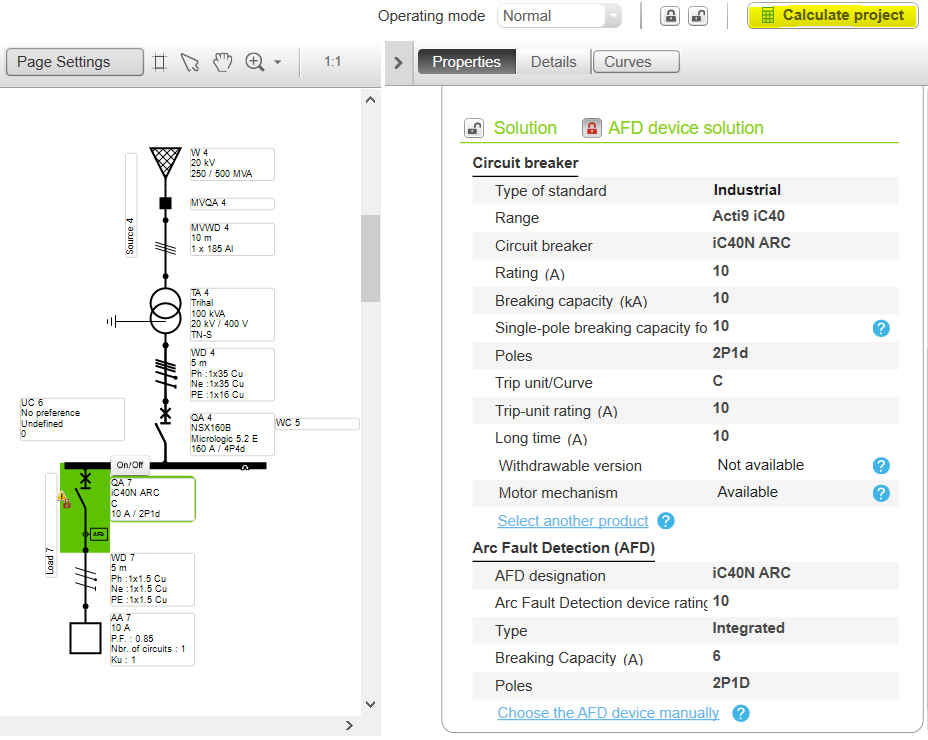
Step 7
Step-1
- Create the network
- Ensure that the AFD is getting used in 50HZ & Single phase network and up to 25A (NL) & 40A (FR) only for final loads
Step-2
- Select the Circuit breaker in the Feeder
- Enable the AFD
Step-3
- Run the calculation for the automatic selection of the AFD
Step 4
- For manual selection of AFD, Click on it
- Select AFD selection tab for more options
Step 5
- Check the specification and validate as per requirement
Step 6
- Run the calculation
Step 7
- The Feeder is successfully incorporated with AFDD.