


ClearSCADA: Configuring the new WebX in ClearSCADA 2017 R2
Starting in ClearSCADA 2017 R2, the new WebX server component has its own installation wizard. This article describes the installation process along with the steps necessary to configure the new WebX server.
Installation
Install WebX by clicking on 'Install CleraSCADA Web Server' from the installer's splash screen.

Run through the installation wizard, click 'Finish' and then restart your system as per the Wizard's screen shots:

Below is an excerpt from the ClearSCADA 2017 R2 Release Notes. This describes the changes that are required to the ClearSCADA Server Configuration in order to use the new WebX in ClearSCADA 2017 R2:

The recommended steps to take in the server configuration are:

Referring to the screen shot above, ensure that the following steps are performed:
Once these steps are completed, restart the ClearSCADA server and the IIS (Internet Information Services Manager) website.

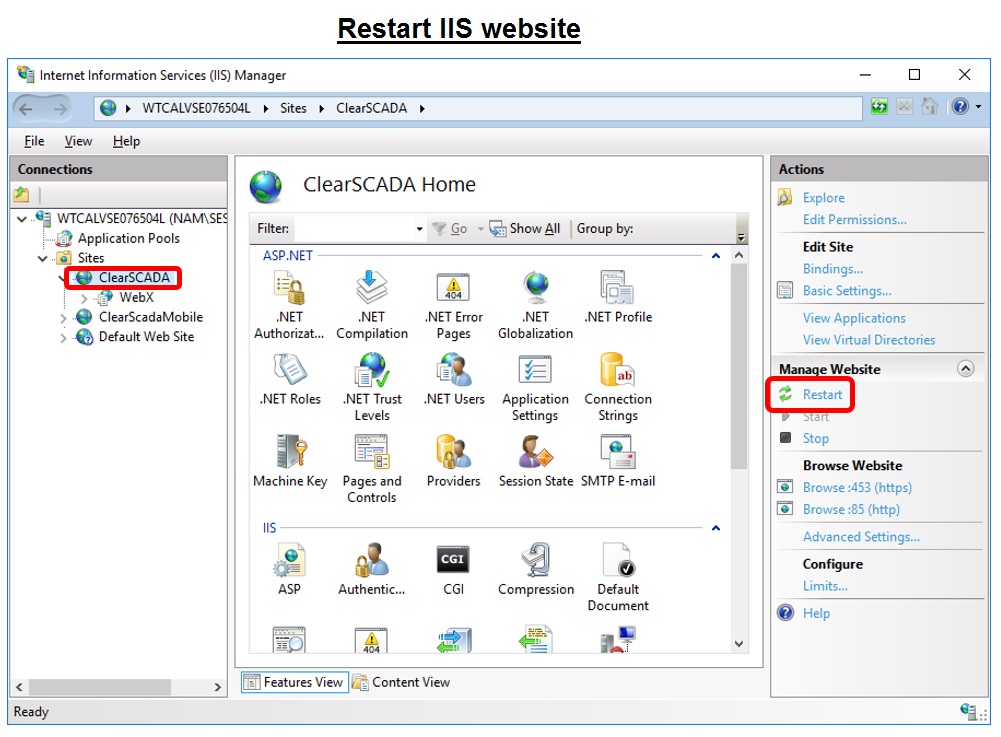
The settings in IIS have changed between ClearSCADA 2017 and ClearSCADA 2017 R2. The screen shots below reflect the changes that as user will see:


Installation
Install WebX by clicking on 'Install CleraSCADA Web Server' from the installer's splash screen.
Run through the installation wizard, click 'Finish' and then restart your system as per the Wizard's screen shots:
Below is an excerpt from the ClearSCADA 2017 R2 Release Notes. This describes the changes that are required to the ClearSCADA Server Configuration in order to use the new WebX in ClearSCADA 2017 R2:
The recommended steps to take in the server configuration are:
- Disable the HTTPS port in the WebX settings
- Set the checkboxes (in the 'Security' and 'Certificates' sections) as shown below
Referring to the screen shot above, ensure that the following steps are performed:
- check the 'Allow logon and database writes over non-secure HTTP' checkbox
- disable the HTTPS port by unchecking the checkbox
- uncheck the 'warn on self-signed certificate' checkbox
Once these steps are completed, restart the ClearSCADA server and the IIS (Internet Information Services Manager) website.
The settings in IIS have changed between ClearSCADA 2017 and ClearSCADA 2017 R2. The screen shots below reflect the changes that as user will see:
Publicado para: Schneider Electric Mexico

¿Necesitas ayuda?
Selector de productos
Encuentra rápida y fácilmente los productos y accesorios adecuados para tus aplicaciones.
Pedir presupuesto
Comienza tu consulta de ventas en línea y un experto se pondrá en contacto contigo.
¿Dónde comprar?
Encuentra fácilmente el distribuidor de Schneider Electric más cercano a ti.
Centro de ayuda
Encuentra recursos de soporte para todas tus necesidades en un solo lugar.