


How to convert Prisma project into PrismaSet project
How to convert Prisma Project into PrismaSet
Pre-Requisite
Note: Do not Forget to Save a Baseline version of the Project & work only on a copy of the project.
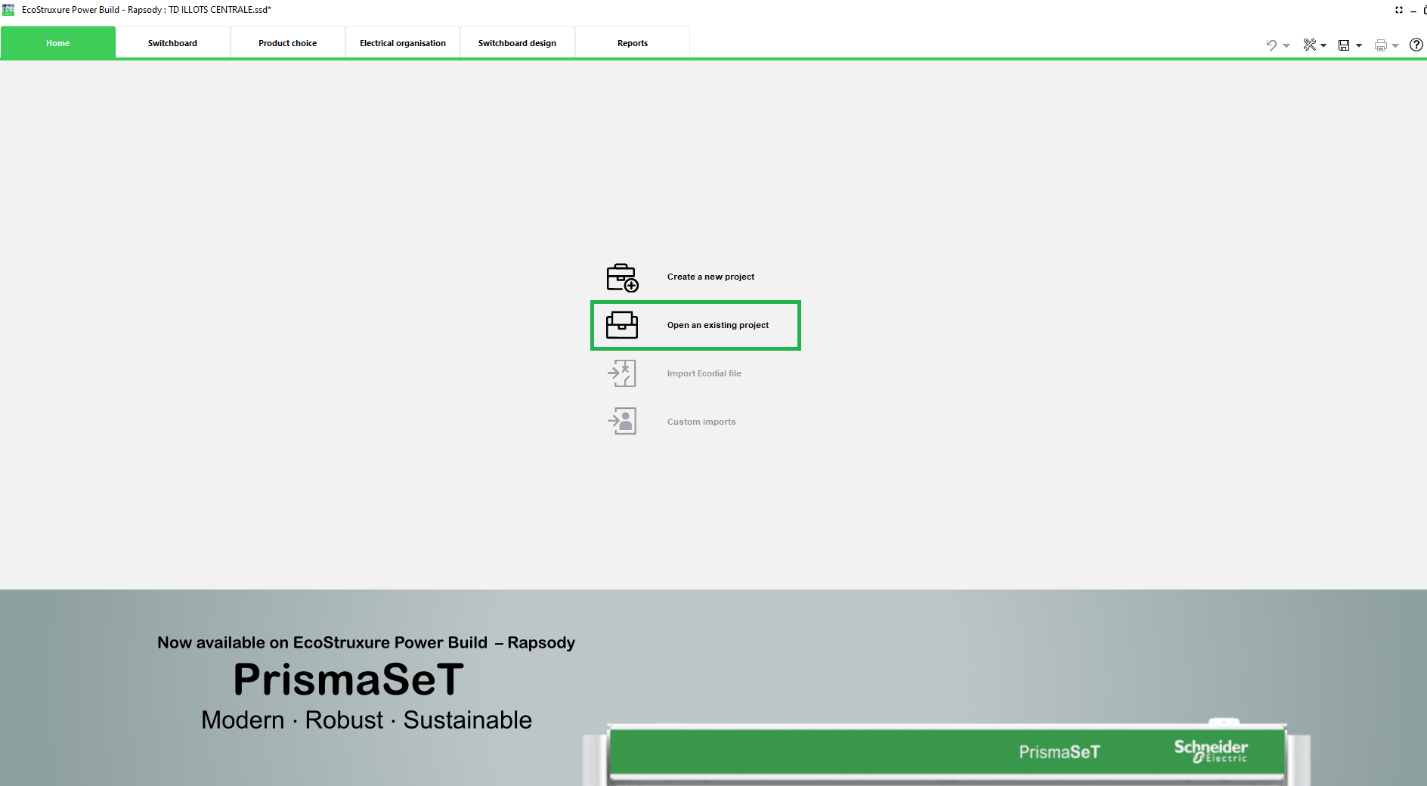
Step1: Launch Rapsody software and select the option "Open an existing project"
Step2: update Price and Project
Two methods depending if your version of Ecostruxure Power Build – Rapsody has an updated price list.
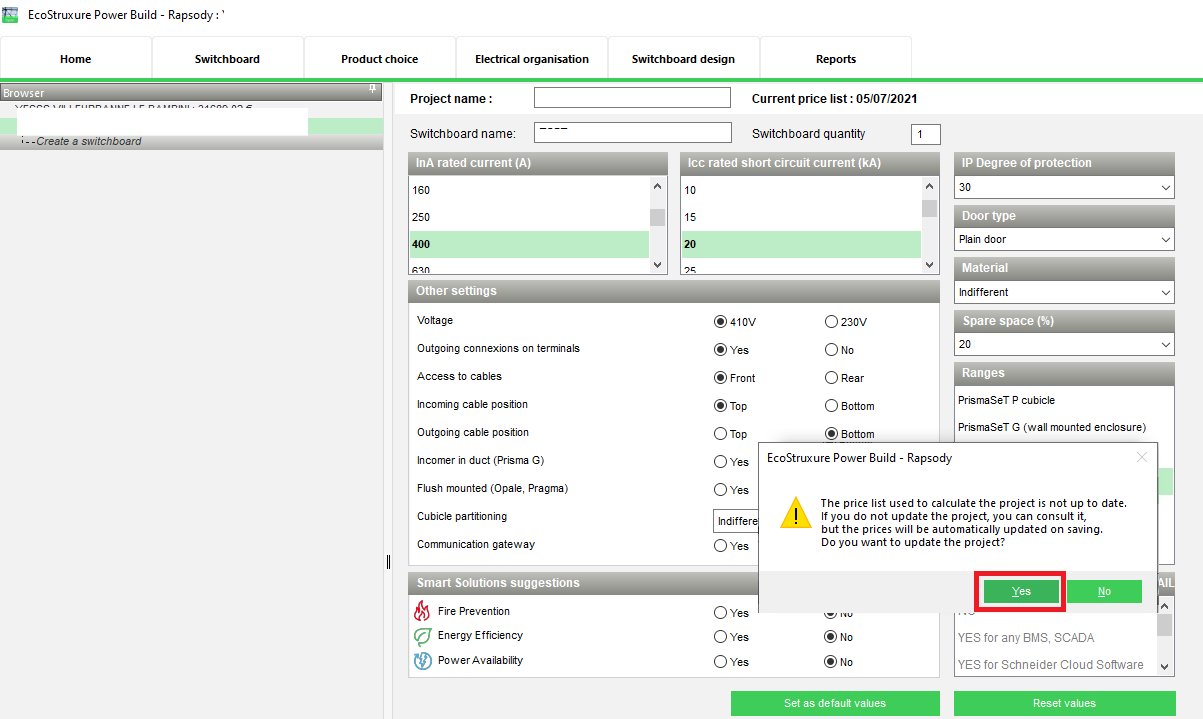
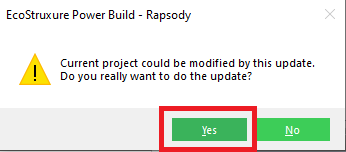
Step2-a: If you get the below message after loading the existing project, Click Yes and continue from step6
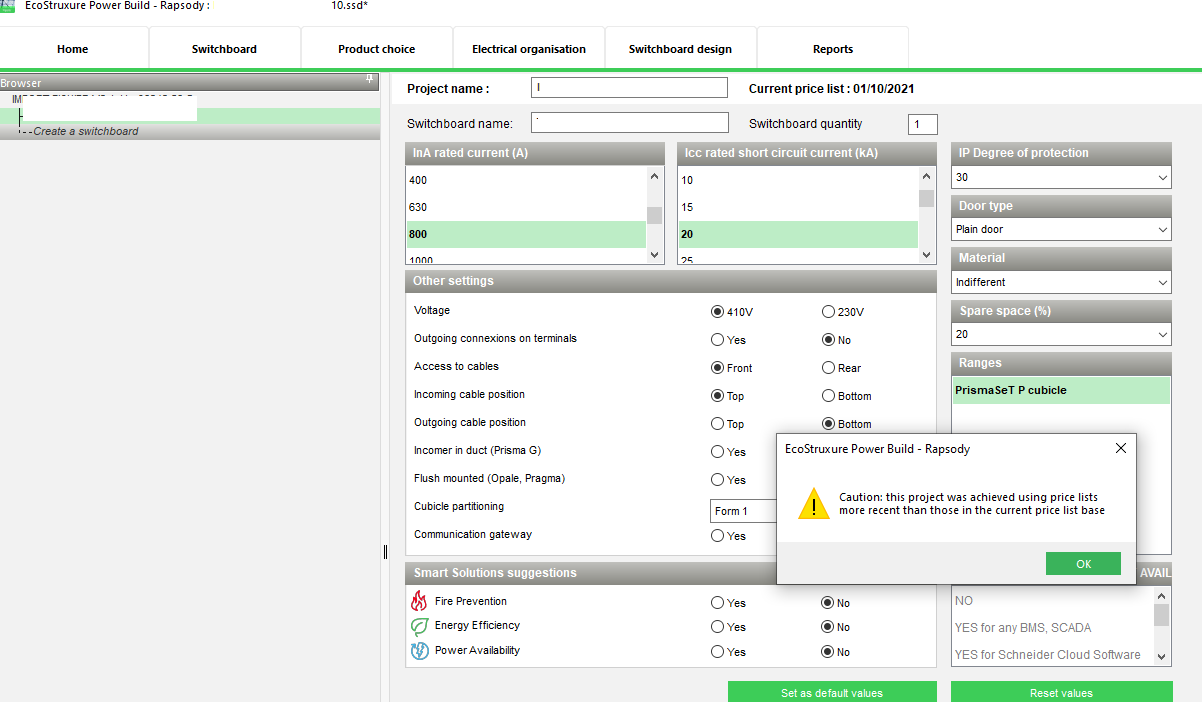
Step2-b-1: After Step1, if you see the below message after loading the existing project, Click OK
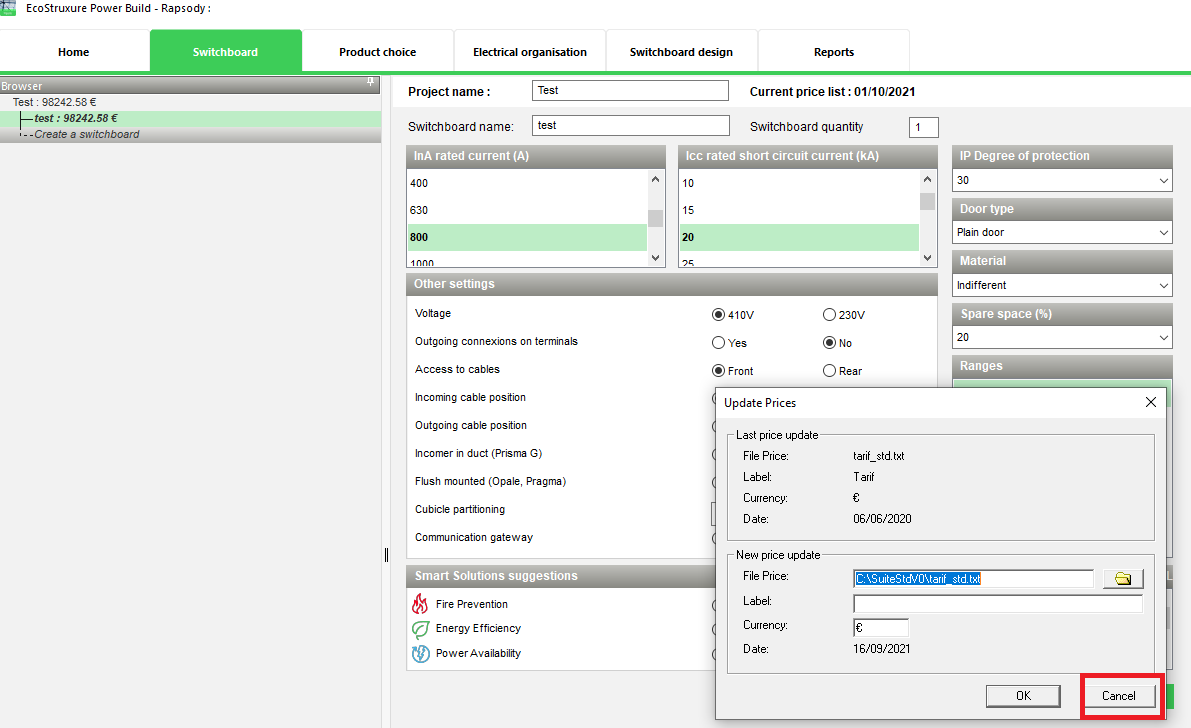
Step2-b-2: Go to Tools Menu and select Update Prices from dropdown

Step2-b-3: Click on Cancel and then Yes
Step3: Updated Prices & references will be shown, if there is any yellow warning, Click on Close and correct the warnings from Product Choice tab as mentioned below
Through control to be performed by User. This update provides only information and requires user’s complete review of each warnings.
Green: all ok
Yellow: catalog evolution requires manual update
Red: Pay special attention to substitution especially on Electrical devices; Using Functional names help to differentiate electrical devices from cubicles, functional units and cubicles.
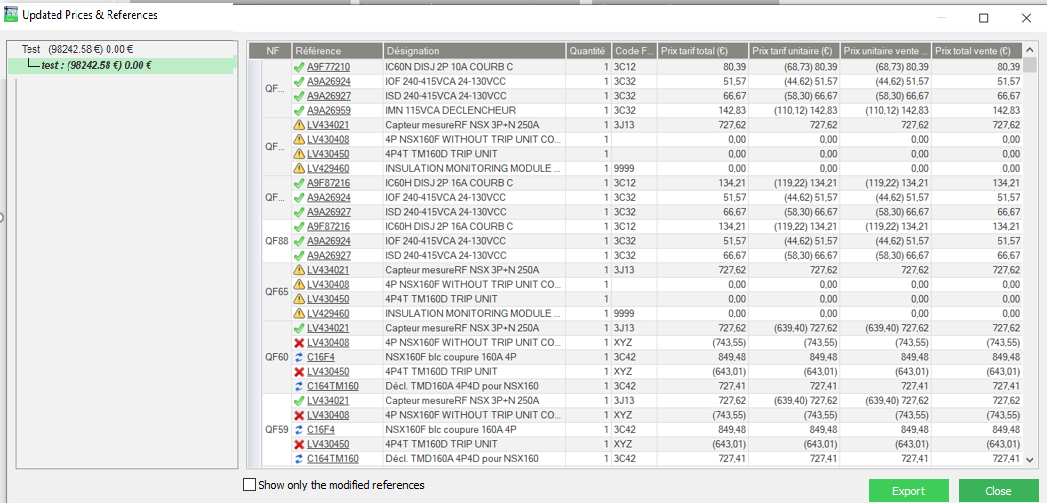
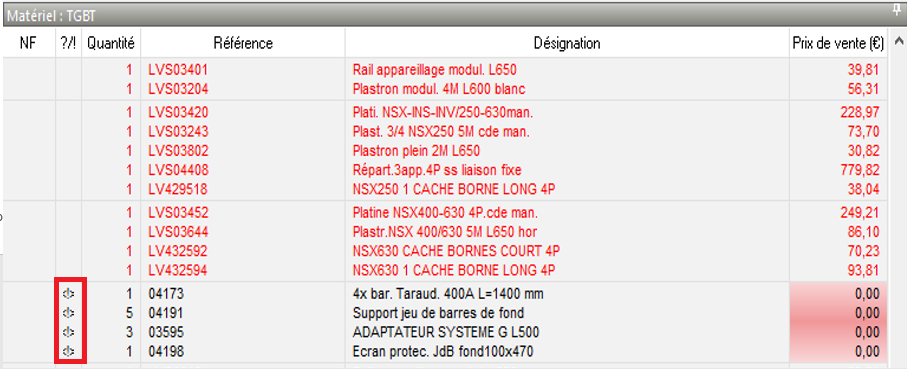
If there is Yellow warning on Updated Prices & References as shown above, these references will be tagged with <!> in Product Choice tab (below screenshot).
Users can retrieve these references and re-play the model to correct the issue in Product Choice tab
Also, these yellow references will show prices as 0 (zero).
Step4: Once project is updated, Go to Switchboard Design Tab and click on Front View and you should be able to see the Prisma project converted to PrismaSet.
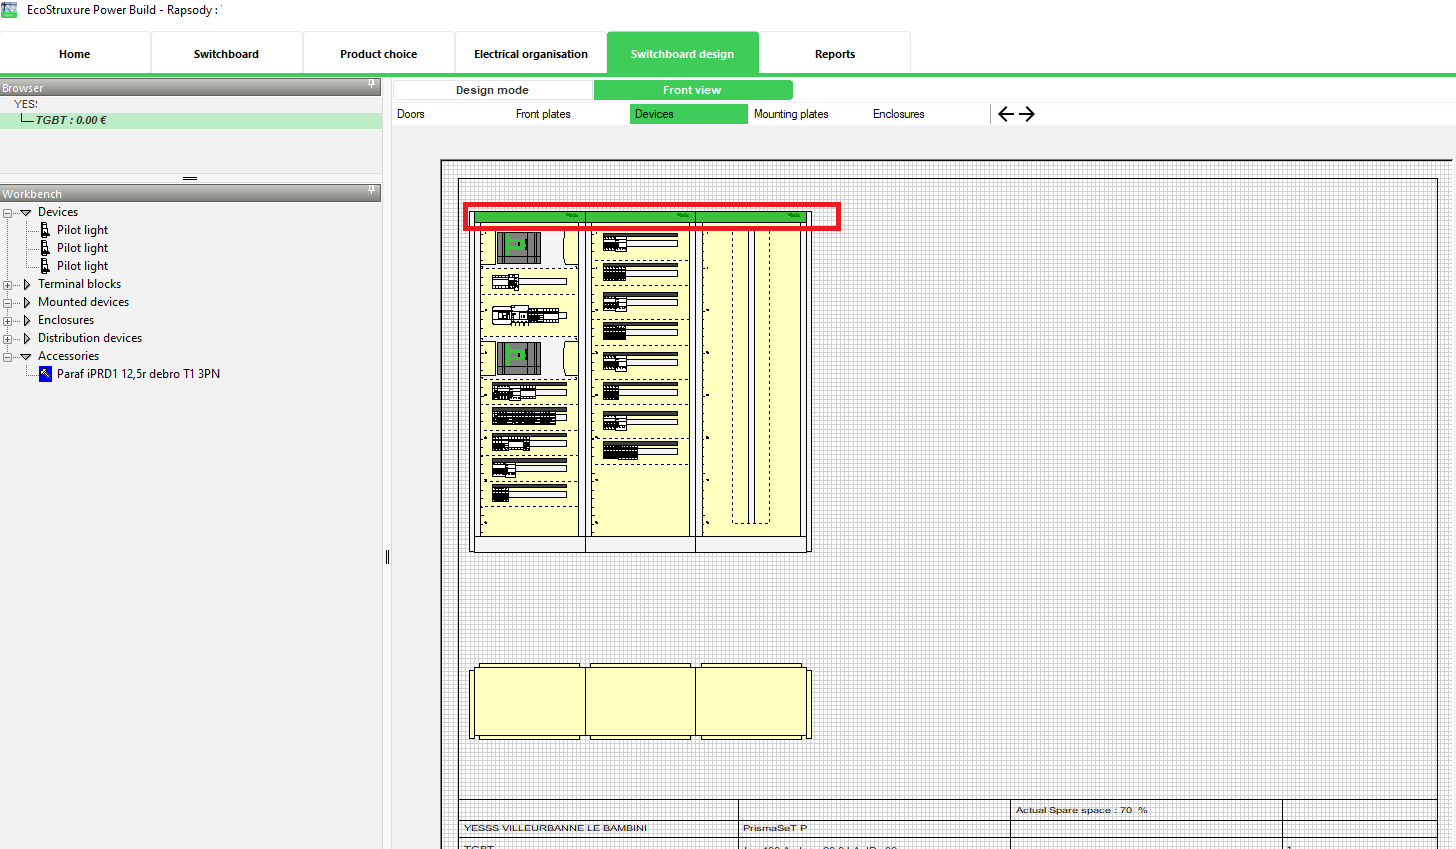
Step5: If you encounter some small glitches on the front view, send back all elements to bench, go to Step by Step, install first enclosure, then install devices.
Pre-Requisite
- Install EBPR V2.3.x (PrismaSet versions)
- Launch application & Register if not done previously
- If Price date is not 01/10/2021, to emulate final version behavior, please load the price list with accurate date through Tools Menu -> Update Prices.
Note: Do not Forget to Save a Baseline version of the Project & work only on a copy of the project.
Step1: Launch Rapsody software and select the option "Open an existing project"
Step2: update Price and Project
Two methods depending if your version of Ecostruxure Power Build – Rapsody has an updated price list.
- Price list updated to current date: direct proposal to update the project
- Price list not yet updated: trigger manually the update by simulating or loading a proper list price
Step2-a: If you get the below message after loading the existing project, Click Yes and continue from step6
Step2-b-1: After Step1, if you see the below message after loading the existing project, Click OK
Step2-b-2: Go to Tools Menu and select Update Prices from dropdown
Step2-b-3: Click on Cancel and then Yes
Step3: Updated Prices & references will be shown, if there is any yellow warning, Click on Close and correct the warnings from Product Choice tab as mentioned below
Through control to be performed by User. This update provides only information and requires user’s complete review of each warnings.
Green: all ok
Yellow: catalog evolution requires manual update
Red: Pay special attention to substitution especially on Electrical devices; Using Functional names help to differentiate electrical devices from cubicles, functional units and cubicles.
If there is Yellow warning on Updated Prices & References as shown above, these references will be tagged with <!> in Product Choice tab (below screenshot).
Users can retrieve these references and re-play the model to correct the issue in Product Choice tab
Also, these yellow references will show prices as 0 (zero).
Step4: Once project is updated, Go to Switchboard Design Tab and click on Front View and you should be able to see the Prisma project converted to PrismaSet.
Step5: If you encounter some small glitches on the front view, send back all elements to bench, go to Step by Step, install first enclosure, then install devices.